Configuring SSO with OneLogin
Single sign on (SSO) with OneLogin will allow users in your organization to sign in to TeamRetro using their existing OneLogin account - no need to create a separate TeamRetro account.
Requirements
You must be an Account OWNER in your TeamRetro instance.
You must be an admin in OneLogin.
Setup Instructions
Open Single Sign on Settings in TeamRetro
- Open TeamRetro.
-
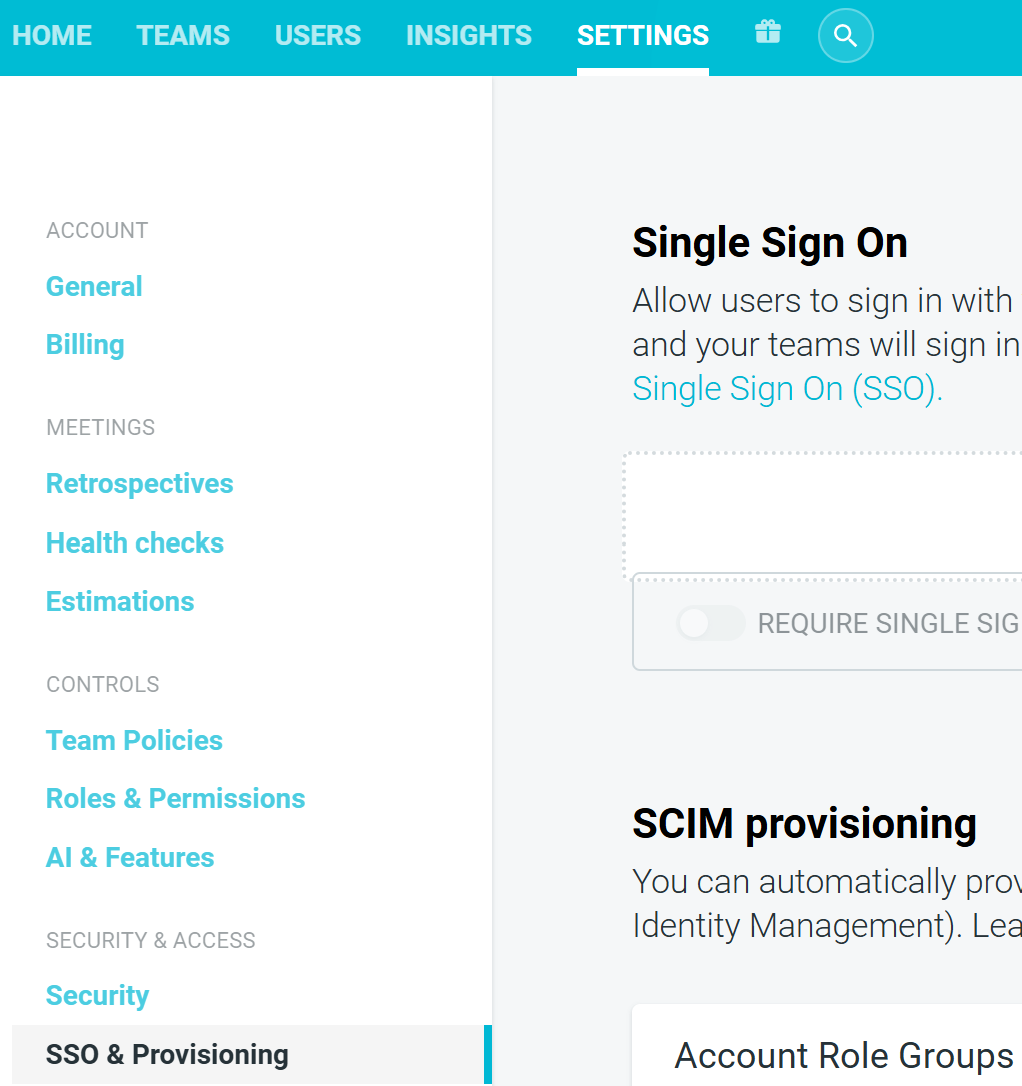
Select the SETTINGS —> SSO & PROVISIONING tab.
-
Select ADD IDENTITY PROVIDER.

-
You will be presented with your TeamRetro service provider (SP) settings (you should see URL slugs where the boxes are).
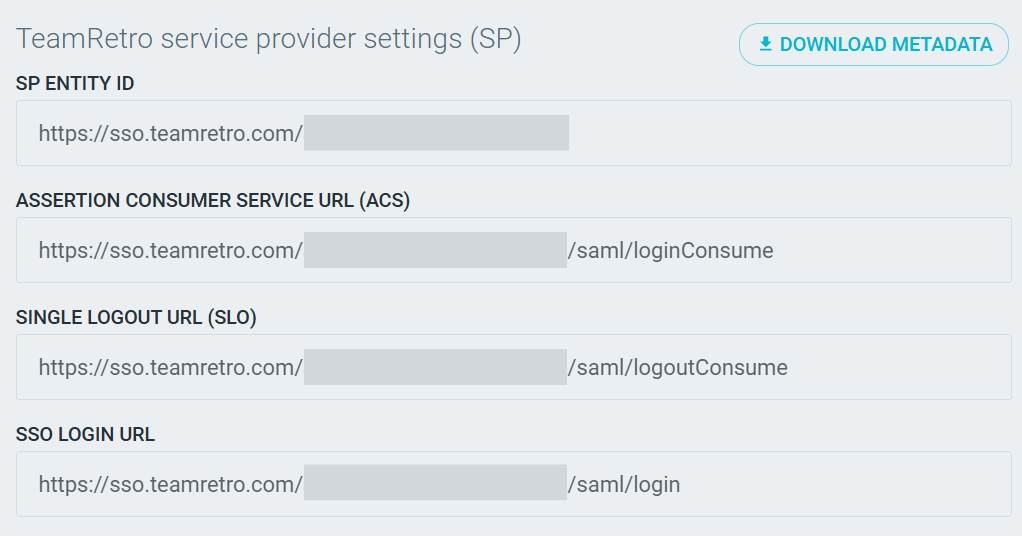
Leave this window open for the moment - we'll need this information to complete the configuration of the TeamRetro app in OneLogin.


Configure Application in OneLogin
- Open OneLogin dashboard in new tab or window.
-
In your OneLogin admin dashboard, select APPLICATIONS -> APPLICATIONS.

-
Search for "SAML Test" and select SAML Custom Connector (Advanced).

- On the Configuration screen:
- Enter DISPLAY NAME: TeamRetro
- Enter DESCRIPTION: Online agile retrospective meetings for distributed teams
-
Upload the TeamRetro logos (you can download the ones below)


-
Click Save.

- On the Configuration tab:
- Enter the following values:
- Audience: [copy the SP Entity ID from the TeamRetro tab]
- ACS (Consumer) URL Validator: ^https:\/\/sso\.teamretro\.com\/[a-z0-9]{22}\/saml\/(samlLoginConsume|samlLogoutConsume)$
-
ACS (Consumer) URL: [copy the Login ACS Url from the TeamRetro tab]

-
Click Save.
- Enter the following values:
- Switch to the PARAMETERS tab.
- Add the following fields:
- avatarUrl: Profile Picture
- email: Email
- firstName: First Name
-
lastName: LastName

For a full list of supported SAML attributes please see TeamRetro Supported SAML Attributes.
- Click SAVE.


-
Switch to the SSO tab and download the IdP metadata file - MORE ACTIONS > SAML METADATA - you'll need this in a moment.


Configuring Single Sign On in TeamRetro
Back in TeamRetro, it's time to add your OneLogin Identity Provider (IdP) details.
-
Under Identity provider settings (IdP), click UPLOAD METADATA.

- Find and open the "onelogin-metadata-*****.xml" file you downloaded from OneLogin a few minutes ago. If successful, the IDP ENTITY ID, LOGIN URL, and SIGNING CERTIFICATE fields should be automatically be populated.
-
Enter "OneLogin" into the FRIENDLY NAME field.

-
Toggle the identity provider to ENABLED.

- Click SAVE CHANGES.
-
Click TEST.


In a new window, you will be redirected to OneLogin to sign in. If you are redirected back to TeamRetro your configuration has succeeded. If you encounter any errors or warnings; please contact info@teamretro.com and we'll help you out.

App Tile / Launcher URL
If you want users to access TeamRetro from an app tile or launcher in your identity provider, set the tile URL to the SSO Login Url shown in your TeamRetro SP settings:
https://sso.teamretro.com/{your-slug}/saml/login
You can find your slug in the SP Entity ID shown in the TeamRetro SSO settings (the part after sso.teamretro.com/ ).
Important: Do not use the Assertion Consumer Service Url (ACS) shown in TeamRetro's SP settings (/saml/loginConsume ) as a tile or bookmark. That URL only accepts POST requests from your IdP and will show "Page Not Found" if opened in a browser.