Jira software
You can integrate your TeamRetro team with your Jira Software project, to automatically publish team action items as Jira issues. You can also enable a 2-way integration with Jira.
To configure this integration you must be a TeamRetro Team Administrator.

Supported Jira editions:
- Jira Software (Cloud)
- Jira Software (Data Center)
Supported authentication methods:
- Jira Cloud - Atlassian Login - connect to your Jira Software (Cloud) instance using the Atlassian Cloud Oauth2 provider.
- Atlassian Cloud - API Token - connect to your Jira Software (Cloud) instance with a secure way of using scripts.
- Jira Data Center - Application Link - connect to your Jira Software (Data Center) using your Jira instance as an Oauth provider.
- Jira Data Center - Basic Authentication - connect to your Jira Software (Data Center) using username / password.
- Jira Data Center - Personal Access Token - connect to your Jira Software (Data Center) using personal access tokens as a safe alternative to authenticating with a username and password.
Please note if connecting to Data Center editions, your Jira instance must be publicly accessible on the internet (so our application can talk to it). For further information how our Jira integration works please refer to Jira Software Integration Security.
Configure in TeamRetro
-
On the team SETTINGS —> INTEGRATIONS screen.
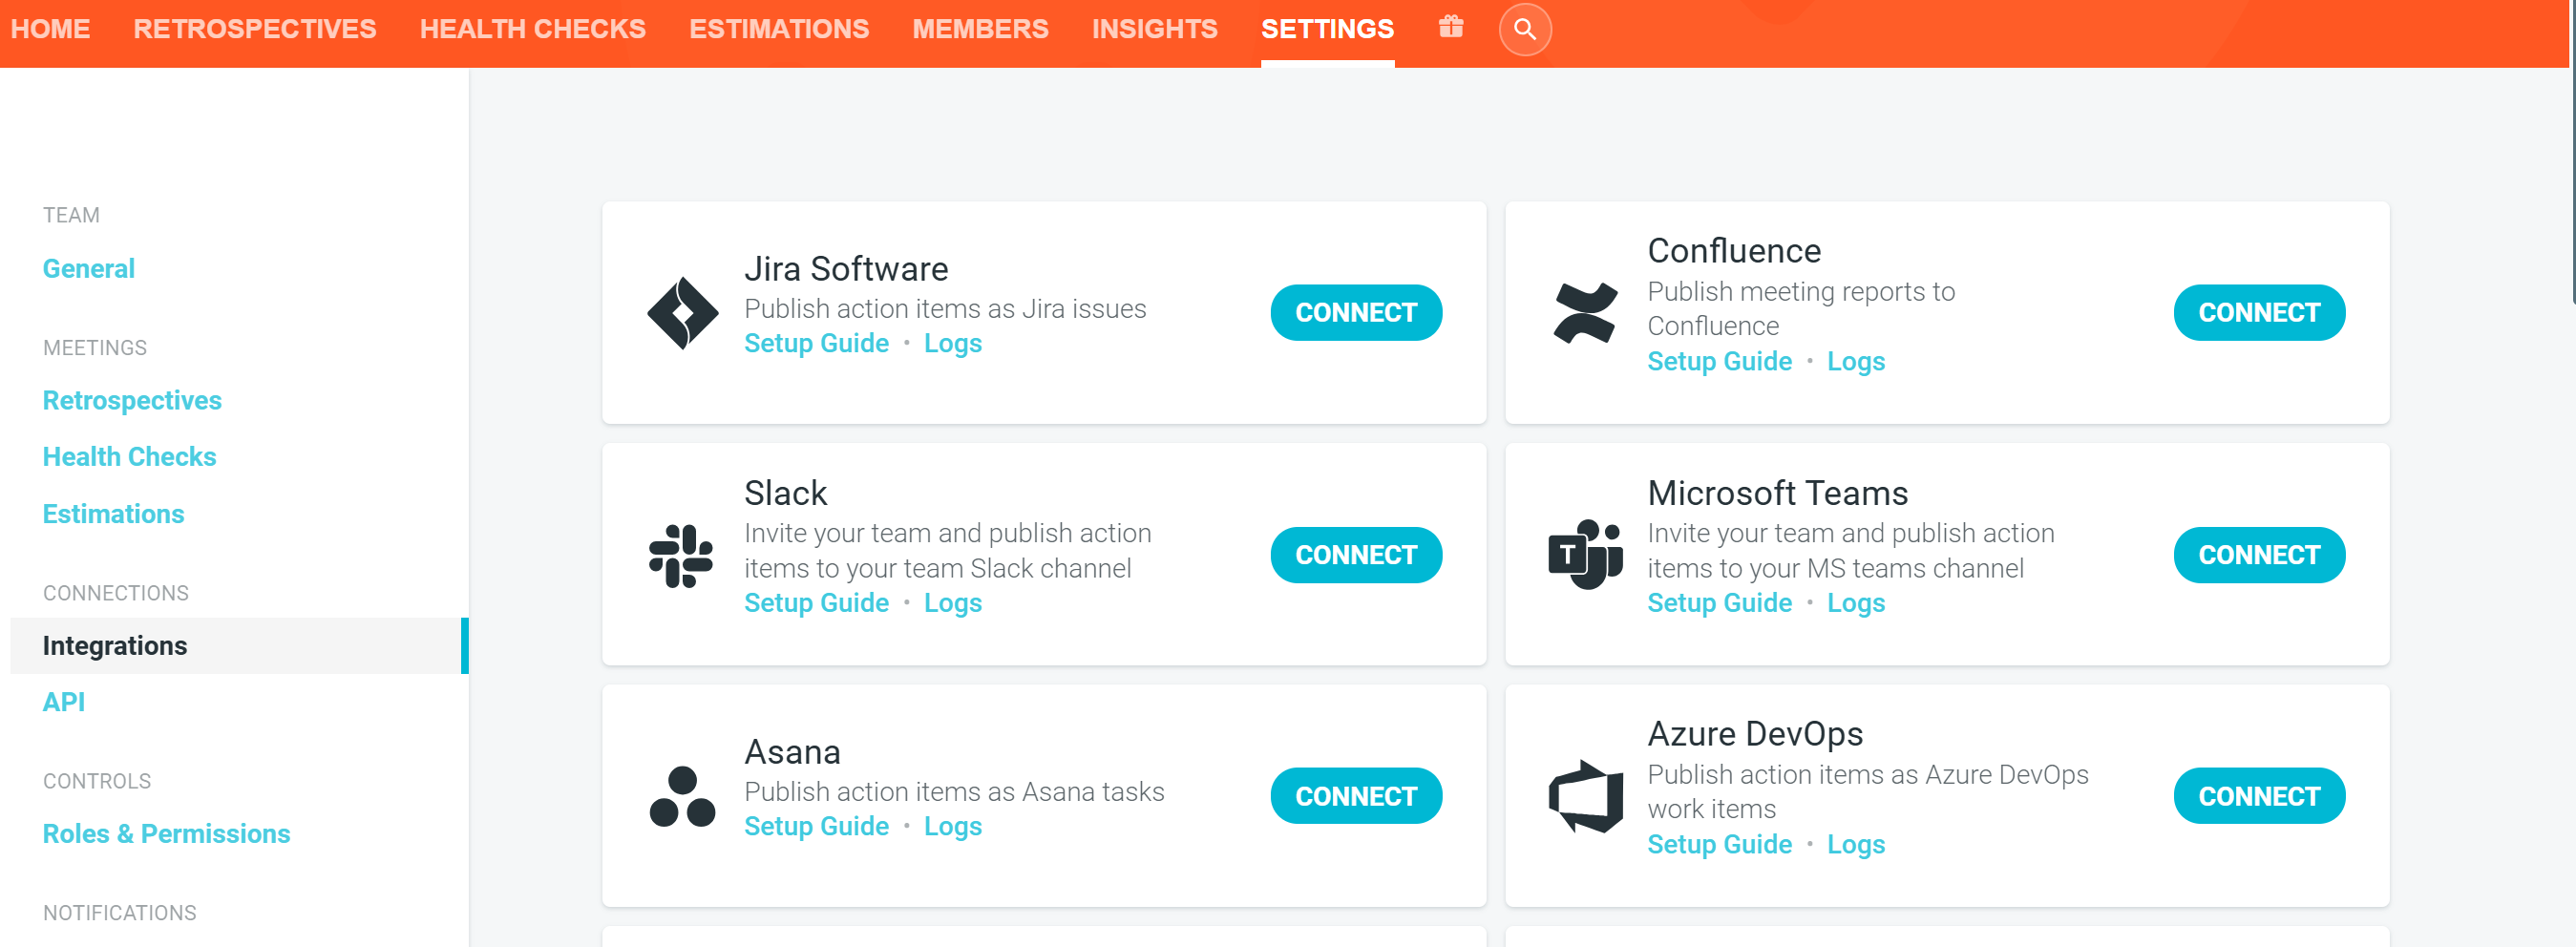
-
Click CONNECT next to Jira Software.

- In the configuration dialog, select the authentication method you wish to use.
- Jira Cloud - Atlassian Login
- Jira Cloud - API Token
- Jira Data Center - Application Link
- Jira Data Center - Basic Authentication.
-
Jira Data Center - Personal Access Token


Jira Cloud - Atlassian Login
-
Click SIGN IN TO ATLASSIAN CLOUD.

-
You will be redirected to atlassian.com to authorize TeamRetro to post and create issues in your Jira cloud.
For further information how our Jira integrations work and the authorization scopes requested, please refer to Jira Software Integration Security.

- Click on ACCEPT to authorize TeamRetro.
-
Select your Atlassian Cloud instance from the dropdown.

- Click NEXT (->).
- Configure in TeamRetro.

Atlassian Cloud - API Token
You first need to configure the API Token in your Jira instance.
Atlassian now supports API tokens with selectable scopes. This allows you to generate tokens with only the permissions your integration needs, improving security and control. We recommend switching to scoped tokens for all new integrations.
- Open your Jira instance in a new tab and navigate to Your profile and settings > Manage account.
- You will be directed to Atlassian Account and select Security tab.
- Click Create and manage API tokens.
Create an API Token
-
Click Create API token.
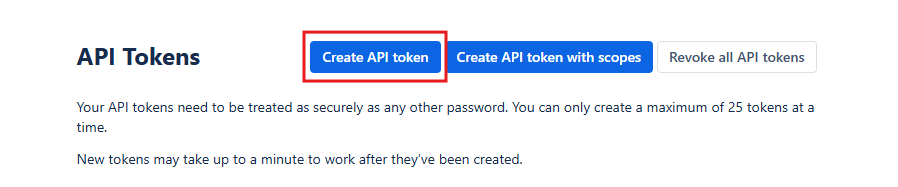
- In the Create API token dialog
- Enter Label: TeamRetro (or similar).
-
Click Create.

-
On the new API token screen, make note of or copy your API token.


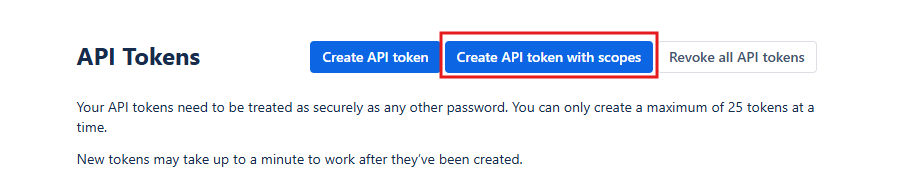
Creating an API token with scopes
-
Click CREATE API TOKEN WITH SCOPES.
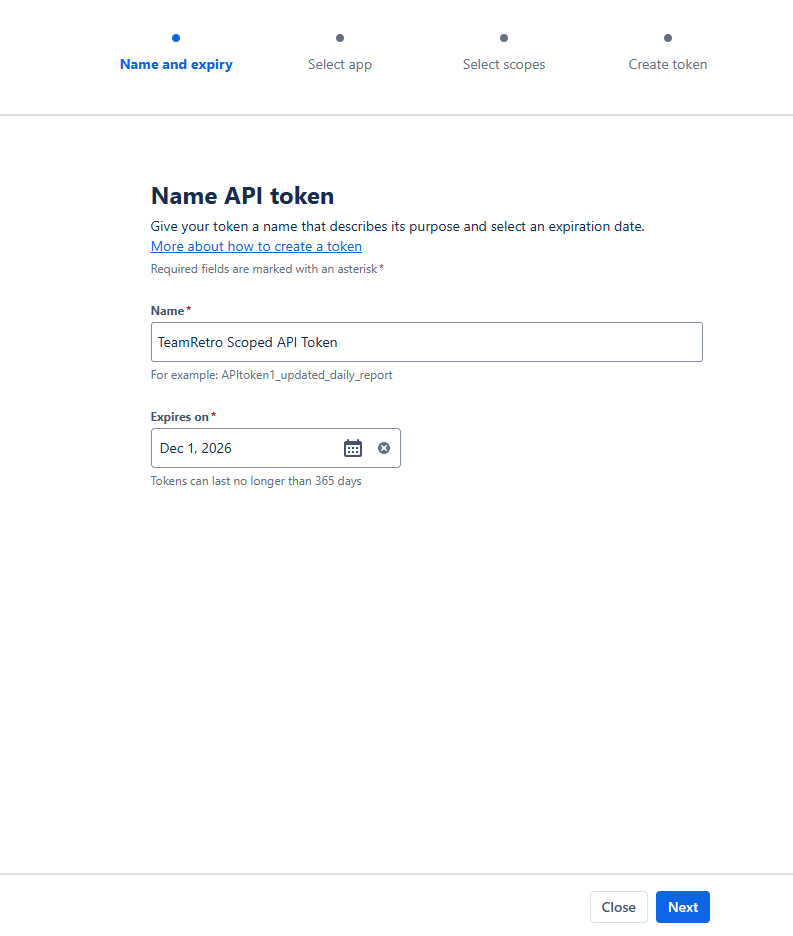
-
Provide a name and expiration date for your API token. Click NEXT.
-
Select JIRA and click on NEXT.

-
Select the required scopes as highlighted in this document. Then click NEXT.
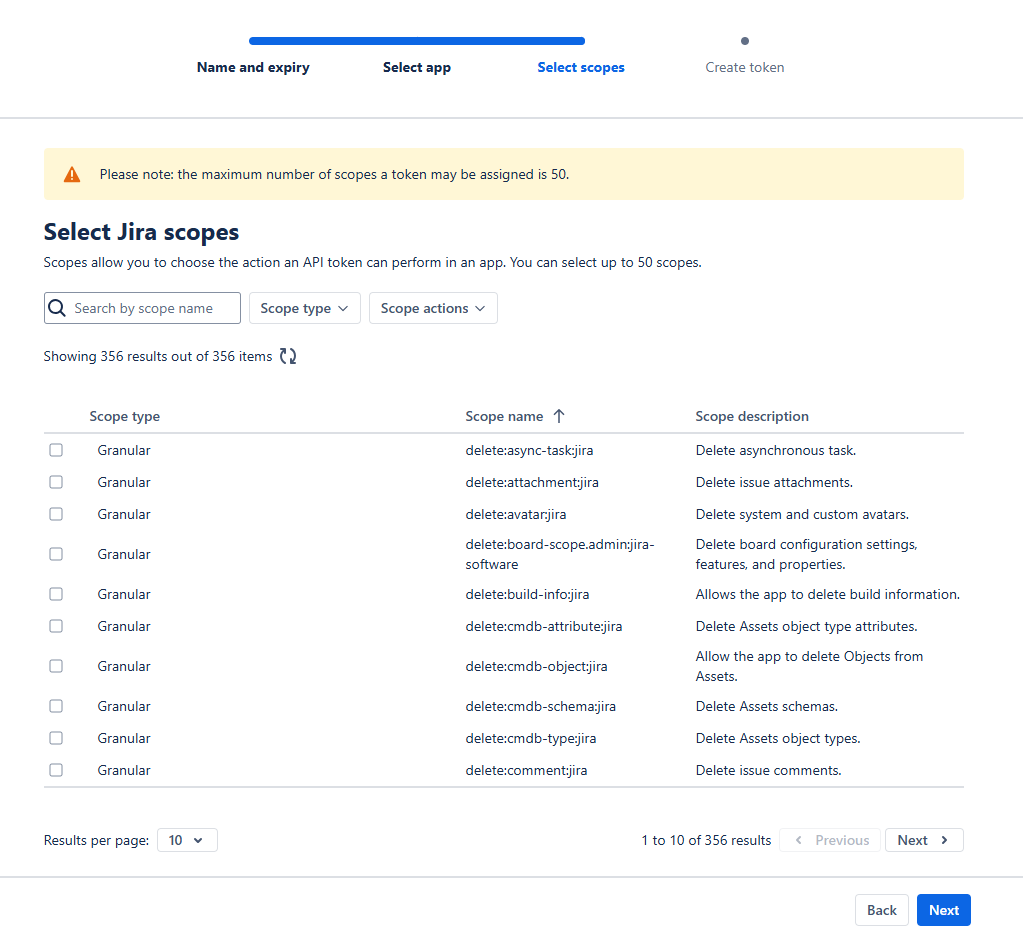
-
Confirm the selected scopes are correct and click CREATE TOKEN.

- Return to the TeamRetro tab.
- Enter your: Atlassian Cloud URL (note: your Jira instance must be accessible on the public internet to our IP addresses).
- Enter your: Email Address.
- Enter your: API token (provided by Jira).
-
Click NEXT (->).

- Configure in TeamRetro.


Jira Data Center - Application Link
You first need to configure the Application Link in your Jira instance.
- Open your Jira instance in a new tab and navigate to Settings > Applications.
- Select Application Links under Integration on the left side.
- Click Create Link.
- In the Create Link dialog:
- Select External Application.
- Select Incoming.
-
Press Continue.

- On the Configure an incoming link page:
- Enter Name: TeamRetro (or similar).
-
Enter Redirect URL:
https://oauth.teamretro.com/integrations/jira/applicationLink (for US environment)
https://oauth.eu.teamretro.com/integrations/jira/applicationLink (for EU environment)
- Select Permission: Write.
-
Click Save.

-
On the Credentials screen, make note of your Client ID and Client secret.

- Return to the TeamRetro tab.
- Enter your: Jira URL (note: your Jira instance must be accessible on the public internet to our IP addresses).
- Enter your Client ID (provided by Jira).
- Enter your Client Secret (provided by Jira).
-
Click NEXT (->).

-
Click SIGN IN TO JIRA.

-
Your Jira instance will prompt you to authorize TeamRetro for access, click Allow.

- Configure in TeamRetro.


Jira Data Center - Basic Authentication
- Enter your:
- Jira URL (note: your Jira instance must be accessible on the public internet to our IP addresses).
- Jira Username (we recommend creating a new user with minimal permissions for this).
-
Jira Password

- Click NEXT (->)
- Configure in TeamRetro.
Jira Data Center - Personal Access Token
You first need to configure the Application Link in your Jira instance.
- Open your Jira instance in a new tab and navigate to Your profile picture > Profile > Personal Access Token.
- Click Create Token.
- In the Create a personal access token dialog
- Enter Name: TeamRetro (or similar).
- Select Expiry date (you can select Automatic expiry or Never expiry).
- Click Create.

-
On the Credentials screen, make note of your Personal Access Token.

- Return to the TeamRetro tab.
- Enter your: Server URL (note: your Jira instance must be accessible on the public internet to our IP addresses).
-
Enter your Personal Access Token (provided by Jira).

- Click NEXT (->) to configure in TeamRetro.

Configuration in TeamRetro
- On the PROJECT screen - choose the project that is associated with this TeamRetro team.

- On the ISSUE TYPE screen - select the Jira Issue Type that should be created for each action item (e.g. Task).

- On the FIELDS screen - you can customize additional fields to be sent to Jira, for example set a label to indicate the issue came from TeamRetro.
Please ensure all required fields in your Jira instance have a suitable value (otherwise publish will fail).

- On the TEST screen - click PUBLISH TEST ACTION ITEM TO JIRA to confirm that your integration is set up correctly. If the new action item is published successfully, you will see a notification with the option to VIEW IN JIRA or DELETE. If an error is encountered (such as a missing required field) details will be displayed.


- Click SAVE CHANGES.
Using Your Integration
- Back on your team HOME screen, click the PUBLISH icon and you will see JIRA SOFTWARE as an option. After selecting, TeamRetro will create a new issue in Jira and display the Issue Number on the action item.

- Individual action items (generated from Retrospectives, Health Checks, Maturity Model Meetings, and Estimation Meetings) can be published to Jira by clicking on the Jira icon on the right hand side and selecting PUBLISH TO JIRA SOFTWARE.

Jira 2-Way Synchronization
When enabled, TeamRetro will periodically check the action items it’s published to your Jira instance. If the completion state, due date, assignment or priority has been updated, these will be reflected back in TeamRetro.
- Completion status - fully synchronized
- Due date - fully synchronized
- Assignment - best effort (user must exist in TeamRetro)
- Priority - best effort (equivalent priority must exist in TeamRetro)
The synchronization syncs any Jira issues that have been modified within the past 24 hours.
Only Jira issues originally created by TeamRetro will be polled and synchronized.
